Call analyses tab
This topic describes the Call analyses tab on the Case management view, which by default is located at the left of the ESPA analysis center screen.
This feature requires your account to be configured with the ESPA analysis center screen.
The Call analyses tab displays a statistical analysis of the phone numbers you have selected in Sources. In the Call analyses tab these phone numbers are titled the Target number. The analysis information can be used to find critical leads and evidence during your investigation, for example:
- Who the phone user calls the most, for example friends and relatives. This information is useful to you in many ways, for example the phone user may be in hiding and this information could be helpful in locating them.
-
The common numbers called by two or more phone users. This information may help you to identify another suspect or gang hierarchy.
-
The most frequently visited geographic locations of the phone user, for example this may be their home, employment location, night-time activity locations, and areas of illegal activities.
-
Where the phone user may be sleeping at night or hiding out.
-
Their calling pattern broken down by hour. This information provides you with the phone users daily calling behavior.
- Target phone users who were physically close to each other during similar times.
- Target phone users that were identified as being at any of the locations.
- Identifies all the target phone numbers that were at each location.
- Their most frequently used sectors by hour and day.
- The top sectors where the phone is located for a long period of time without making or answering any calls or sending any SMS messages.
OSS-ESPA can identify phone numbers as being the same even if the phone number that is entered by the phone user is slightly different, for example if they sometimes use a 1 at the start of the phone number. OSS-ESPA identifies any phone numbers that have ten contiguous digits as being the same phone number, for example 12223334444, 2223334444 and 22233344445 would be identified as the same phone number.
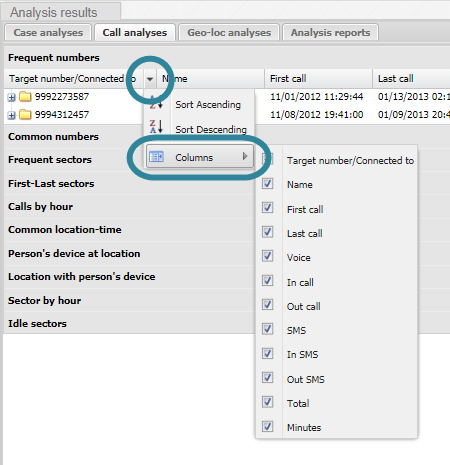
By default the results display all the available columns, for example Frequent numbers displays all the columns shown in the following graphic but you can select to display only certain columns by selecting the down arrow beside an existing column header, then select Columns.
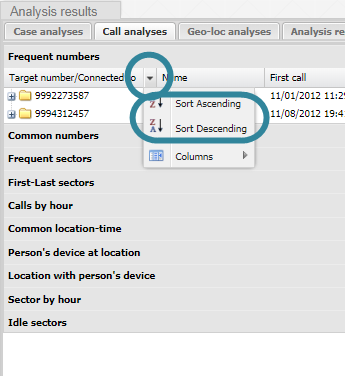
You can also reorder the listings of the results by selecting the column header you want to order by, then select either Sort Ascending or Sort Descending as shown in the following graphic.
The  or
or  before each analysis name indicates whether or not the analysis has been run. For an analysis to be run it must either have been:
-
selected on Analysis to run on refresh on the Advanced options dialog box, then Refresh clicked.
-
selected on the Settings & Analyses of the Input and settings view.
-
run individually by clicking the
before the analysis name.

Click to open or close the view. You can also click and drag the view border to change the view size.


Click to expand the view of the Case management view so that it displays the total width of the contents of the currently selected tab. If the view is expanded click to restore it to its previous size.

Click to display a list of all the tabs that are currently open on the Case management view. This is useful if you have a lot of tabs open as it provides an alternative method to select that tabs rather than locating them by scrolling along them.

Click to export a .csv file of the call analysis results.
For each of the target phone numbers you selected in Sources, this displays by default the top ten most frequently called phone numbers for each target phone number. Any additional phone calls are grouped under the result titled Other. Click  beside a target phone number to display the details of the frequently called phone numbers. You can change the number of results displayed from the default of ten using Items to calculate.
The following columns are displayed:
- Name: for the folder this displays the name you have entered for the phone number. For all other items this displays names that have come from uploaded files such as phone data and public record data.
- ICW: the In Contact With column allows you to quickly determine if an associate of your target is also an associate of other targets in your OSS-ESPA account. If they are then this column contains a colon-separated list of the other target names or phone numbers.
- First call: this displays the first time a call or SMS was made or received between the two phone numbers. This, along with Last call allows you to investigate the calling pattern between the two phone numbers. The following are examples of how this data may help your investigation:
- The number may be in this most frequently called phone numbers list but only because there were many calls during the time of the crime and outside of that time there was no phone contact. Depending on your crime this may indicate they were an accomplice.
- Anyone who calls often but stops calling around the time of a crime, for example a murder or an abduction, is a potential suspect. For example, a boyfriend may call his girlfriend frequently, but if his last call is immediately before the time his girlfriend is murdered then this may indicate that he knew of the murder and therefore he stopped calling her.
- A new frequently called contact may be a potential suspect. For example, the time of the first call may indicate that a victim just met the contact a few days prior to the crime.
- Last call: this displays the last time a call or SMS was made or received between the two phone numbers. This, along with First call allows you to investigate the calling pattern between the two phone numbers. Refer to the examples in First call on how this data may help your investigation.
- Voice: this displays the total call count between the two phone numbers. Either phone number may have originated the call. It also includes all calls made to the person's voicemail.
- In call: this displays the total call count between the two phone numbers when the target number is receiving an incoming call.
- Out call: this displays the total call count between the two phone numbers when the target number is initiating an outgoing call.
- Mail call: this displays all calls made to the person's voicemail.
- Other call: this displays all calls that cannot be identified as a voice or mail call.
- Message: this displays the total SMS, MMS, and RCS count between the two phone numbers. Either phone number may have sent the communication.
- In message: this displays the total SMS, MMS, and RCS count between the two phone numbers when the target number is receiving an incoming communication.
- Out message: this displays the total SMS, MMS, and RCS count between the two phone numbers when the target number is sending an outgoing communication.
- Other message: this displays all message communications that cannot be identified as SMS, MMS, or RCS.
- Total: this displays the combined voice call and SMS call counts between the two phone numbers. By default the results are ordered using this column with the most frequently contacted phone number first.
- Minutes: this displays the total number of minutes for all voice calls between the two phone numbers.
You do not need to upload cell tower data to display the analysis list. However if you additionally want the analysis list to interact with the map and CDR data and Sector data tabs then you must upload cell tower data, then when you right-click any of the frequent numbers you can:
- Select all CDRs for this item: this updates the CDR data and Sector data tables so that only those calls and sectors used with the frequent number are displayed as selected in the check-box. The map view is also updated to only highlight those sectors used during the phone calls with the frequent number.
- Deselect all CDRs for this item: this updates the CDR data and Sector data tables so that those calls and sectors used with the frequent number are not displayed as selected in the check-box. The map view is also updated so that those sectors used during the phone calls with the frequent number are not highlighted.
You can also use the results in this analysis to request a CLEAR or Whooster match:
-
Request CLEAR for this number or Request Whooster for this number: is available to select on each of the individual frequently called phone numbers. Click to immediately request a CLEAR or Whooster match on the selected phone number.
For Whooster you can also select:
- Current phone info: this retrieves the current name and address for the phone number.
- Historical phone info: this retrieves everything from Current phone info, and additionally includes all previous names and addresses for the phone number.
- Advanced: this retrieves everything from Historical phone info, and additionally includes the Person Credit Header.
- Advanced plus: this retrieves everything from Advanced, and additionally includes social media profiles and online advertising summaries. The primary Web sites searched are Craigslist and Backpage.
-
Open CLEAR request wizard or Open Whooster request wizard: is available to select on both the target phone numbers and each of the individual frequently called phone numbers. Which phone number you click to open the wizard is irrelevant so click on any to open the CLEAR request wizard or Whooster request wizard and use it to select what phone numbers you want to request a CLEAR or Whooster match on.
These options are only available if your administrator has selected Allow batch request from AC UI.
-
Request CLEAR for numbers in node or Request Whooster for numbers in node: is only available to select on the target phone numbers. Click to immediately request a CLEAR or Whooster match on all the frequently called phone numbers listed for the selected target phone number.
For Whooster you can also select:
- Current phone info: this retrieves the current name and address for the phone number.
- Historical phone info: this retrieves everything from Current phone info, and additionally includes all previous names and addresses for the phone number.
- Advanced: this retrieves everything from Historical phone info, and additionally includes the Person Credit Header.
- Advanced plus: this retrieves everything from Advanced, and additionally includes social media profiles and online advertising summaries. The primary Web sites searched are Craigslist and Backpage.
If you require information on requesting a CLEAR or Whooster match refer to Using public record files when investigating a case.
Edit person: right-click any of the targets to open the Edit person screen. This allows you to quickly update the personal details in the global person database. When you return to the ESPA analysis center you must click Refresh to apply your updates to the screen.
Edit associated person: right-click any of the contacts to open the Edit person screen. This allows you to quickly update the associates personal details in the global person database. When you return to the ESPA analysis center you must click Refresh to apply your updates to the screen.
This analysis requires you to have selected a minimum of two target phone numbers in Sources. For the target phone numbers you selected, this displays all the common phone numbers which all the target phone numbers have communicated with. Click beside a common phone number to display the details of the individual target phone numbers. The following columns are displayed:
- Name: for the folder this displays the name you have entered for the phone number. For all other items this displays names that have come from uploaded files such as phone data and public record data.
- ICW: the In Contact With column allows you to quickly determine if an associate of your target is also an associate of other targets in your OSS-ESPA account. If they are then this column contains a colon-separated list of the other target names or phone numbers.
- # Targets: for the folder this displays the number of targets that have this phone number in common.
- First call: this displays the first time a call or SMS was made or received between the two phone numbers. This, along with Last call allows you to investigate the calling pattern between the two phone numbers. The following are examples of how this data may help your investigation:
This data can be used in a similar way to the first and last calls in Frequent numbers, however additionally you can analyze multiple suspects together, or the suspect's and victim's calling pattern with a common number.
- If a person is calling both the suspect and the victim after the crime to find out the location of the victim it may suggest they are unaware of the crime. You may therefore decide to exclude the person as a suspect.
If a person is calling the suspect, but has stopped calling the victim it may indicate that they knew of the murder and they therefore may be an accomplice. You may therefore decide to include the person as a suspect.
- Last call: this displays the last time a call or SMS was made or received between the two phone numbers. This, along with First call allows you to investigate the calling pattern between the two phone numbers. Refer to the examples in First call on how this data may help your investigation.
- Voice: this displays the total call count between the two phone numbers. Either phone number may have originated the call. It also includes all calls made to the person's voicemail.
- In call: this displays the total call count between the two phone numbers when the target number is receiving an incoming call.
- Out call: this displays the total call count between the two phone numbers when the target number is initiating an outgoing call.
- Mail call: this displays all calls made to the person's voicemail.
- Other call: this displays all calls that cannot be identified as a voice or mail call.
- Message: this displays the total SMS, MMS, and RCS count between the two phone numbers. Either phone number may have sent the communication.
- In message: this displays the total SMS, MMS, and RCS count between the two phone numbers when the target number is receiving an incoming communication.
- Out message: this displays the total SMS, MMS, and RCS count between the two phone numbers when the target number is sending an outgoing communication.
- Other message: this displays all message communications that cannot be identified as SMS, MMS, or RCS.
- Total: this displays the combined voice call and SMS call counts between the two phone numbers.
- Minutes: this displays the total number of minutes for all voice calls between the two phone numbers.
You do not need to upload cell tower data to display the analysis list. However if you additionally want the analysis list to interact with the map and CDR data and Sector data tabs then you must upload cell tower data, then when you right-click any of the common numbers you can:
- Select all CDRs for this item: this updates the CDR data and Sector data tables so that only those calls and sectors used with the common number are displayed as selected in the check-box. The map view is also updated to only highlight those sectors used during the phone calls with the common number.
- Deselect all CDRs for this item: this updates the CDR data and Sector data tables so that those calls and sectors used with the common number are not displayed as selected in the check-box. The map view is also updated so that those sectors used during the phone calls with the common number are not highlighted.
You can also use the results in this analysis to request a CLEAR or Whooster match:
-
Request CLEAR for this number or Request Whooster for this number: is only available to select on the target phone numbers. Click to immediately request a CLEAR or Whooster match on the selected phone number.
For Whooster you can also select:
- Current phone info: this retrieves the current name and address for the phone number.
- Historical phone info: this retrieves everything from Current phone info, and additionally includes all previous names and addresses for the phone number.
- Advanced: this retrieves everything from Historical phone info, and additionally includes the Person Credit Header.
- Advanced plus: this retrieves everything from Advanced, and additionally includes social media profiles and online advertising summaries. The primary Web sites searched are Craigslist and Backpage.
- Open CLEAR request wizard or Open Whooster request wizard: is only available to select on the target phone numbers. Which phone number you click to open the wizard is irrelevant so click on any to open the CLEAR request wizard or Whooster request wizard and use it to select what phone numbers you want to request a CLEAR or Whooster match on.
If you require information on requesting a CLEAR or Whooster match refer to Using public record files when investigating a case.
Edit person: right-click any of the targets to open the Edit person screen. This allows you to quickly update the personal details in the global person database. When you return to the ESPA analysis center you must click Refresh to apply your updates to the screen.
Edit associated person: right-click any of the contacts to open the Edit person screen. This allows you to quickly update the associates personal details in the global person database. When you return to the ESPA analysis center you must click Refresh to apply your updates to the screen.
For each of the target phone numbers you selected in Sources, this displays by default the top ten most frequently used sectors. Any additional sectors are grouped under the result titled Other. Click beside a target phone number to display the details of the frequently used sectors.
You can change the number of results displayed from the default of ten using Items to calculate.
The following columns are displayed:
- First call: this displays the first time a call or SMS was made or received using the sector. This, along with Last call allows you to investigate the calling pattern using that specific sector. The following are examples of how this data may help your investigation:
- A sector may be in this most frequently used sector list but only because there were many calls using the sector during the time of the crime and outside of that time the sector was not used.
If the last call from a frequent sector is around the time of the crime, it may indicate that the suspect fled the area or left the area, for example to hide evidence.
If a suspect’s first call from a frequent sector is located near the victim’s home or the victim’s travel location, it may indicate that the suspect has traveled to this location to commit the crime, for example to defraud a victim or to commit murder.
- Last call: this displays the last time a call or SMS was made or received using the sector. This, along with First call allows you to investigate the calling pattern using that specific sector. Refer to the examples in First call on how this data may help your investigation.
- Voice: this displays the total call count made or received using the sector.
- SMS: this displays the total SMS count made or received using the sector.
- Data: this displays the total data count made or received using the sector.
-
Total: this displays the combined voice call and SMS call counts made or received using the sector. By default the results are ordered using this column with the most frequently used sector first.
NOTE: The Total count displayed on the Call analysis tab will likely not match the number of rows on the CDR data tab. This is because on the Call analyses tab it lists start, handover and end cells separately, whereas on the CDR data tab they are all in the one row. For example, in the following graphic there is a count of 8 on the Call analysis tab and the CDR data tab has 6 rows.

How each sector is titled depends on what information is available in the CDR. The operator name is always displayed. The following details are optional: MSC (switch) name; LAC; Cell id (CID); and Sector id (S). For example, an ATT sector with a LAC of 12345 and a Cell ID of 98765 is titled “ATT[LAC=12345,CID=98765]”. Any sectors without correlated latitude/longitude values include "(no location)" at the end of the title. For example "Sprint[LAC=987](no location)”.
The termination towers are also included in the results unless they are specifically excluded using Exclude terminating towers on the Advanced options dialog box. This is useful as some events may only have end towers, therefore the following indicators are also displayed:
-
S: Start tower
-
H: Handover
-
E: End tower
-
no location: if the start tower and end tower have no valid latitude/longitude
The following graphic shows examples of these indicators:
If the start and end towers are the same then only one event is displayed ending in S. If the start and end towers are different then there is one event displayed for each cell with the starting tower displaying S and the ending tower displaying E.
You do not need to upload cell tower data to display the analysis list. However if you additionally want the analysis list to interact with the map and CDR data and Sector data tabs then you must upload cell tower data, then when you right-click any of the frequent sectors you can:
- Zoom to this item: select to zoom to the latitude and longitude of the selected sector on the map. Note, this is not possible for frequent sectors marked with "(no location)".
- Select all CDRs for this item: this updates the CDR data tab so that only those calls using the frequent sector are displayed as selected in the check-box. The Sector data tab is updated to display only that sector as selected in the check-box. The map view is also updated to highlight the sector.
- Deselect all CDRs for this item: this updates the CDR data and Sector data tables so that those calls and sectors used with the frequent sector are not displayed as selected in the check-box. The map view is also updated so that the sector is not highlighted.
For each of the target phone numbers you selected in Sources, this displays by default the top ten most frequent first-last sectors. Click beside a target phone number to display the details of the frequent first-last sectors. This analysis is designed to help you identify where the phone user is potentially sleeping. For this analysis to be of use there must be a significant amount of calls and the calling period must be greater than 24 hours, however the recommended minimum period is one week. If OSS-ESPA determines the number of calls is not significant to give valid results then no information is displayed.
You can change the number of results displayed from the default of ten using Items to calculate.
The following columns are displayed:
- First call: this displays the first time a call or SMS was made or received using the sector. This, along with Last call allows you to investigate the calling pattern using that specific sector.
- Last call: this displays the last time a call or SMS was made or received using the sector. This, along with First call allows you to investigate the calling pattern using that specific sector.
- Voice: this displays the total call count made or received using the sector.
- SMS: this displays the total SMS count made or received using the sector.
- Total: this displays the combined voice call and SMS call counts made or received using the sector. By default the results are ordered using this column with the most frequently used sector first.
You do not need to upload cell tower data to display the analysis list. However if you additionally want the analysis list to interact with the map and CDR data and Sector data tabs then you must upload cell tower data, then when you right-click any of the first-last sectors you can:
- Zoom to this item: select to zoom to the latitude and longitude of the selected sector on the map. Note, this is not possible for first-last sectors marked with "(no location)".
- Select all CDRs for this item: this updates the CDR data tab so that only those calls using the first-last sector are displayed as selected in the check-box. The Sector data tab is updated to display only that sector as selected in the check-box. The map view is also updated to highlight the sector.
- Deselect all CDRs for this item: this updates the CDR data and Sector data tables so that those calls and sectors used with the first-last sector are not displayed as selected in the check-box. The map view is also updated so that the sector is not highlighted.
For each of the target phone numbers you selected in Sources, this displays a break down of the number of calls by the hour from 00 (00:00 - 00:59) through 23 (23:00 - 23:59). Click beside a target phone number to display the details of the calls by hour. This analysis is designed to help you identify the normal calling behavior of the phone user and to identify any calls that were made outside of the normal calling behavior. For example, if the phone user made frequent calls during the time period 08:00 through 22:00, but there was one instance of a call at 02:00 it may be that this call at 02:00 is associated with a crime you are investigating.
The following columns are displayed:
- Voice: this displays the total call count during the specific hour.
- SMS: this displays the total SMS count during the specific hour.
- Total: this displays the combined voice call and SMS call counts during the specific hour.
- Minutes: this displays the total number of minutes for all voice calls during the specific hour.
You do not need to upload cell tower data to display the analysis list. However if you additionally want the analysis list to interact with the map and CDR data and Sector data tabs then you must upload cell tower data, then when you right-click any of the hours you can:
- Select all CDRs for this item: this updates the CDR data and Sector data tables so that only those calls and sectors used during that hour are displayed as selected in the check-box. The map view is also updated to only highlight those sectors used during the hour.
- Deselect all CDRs for this item: this updates the CDR data and Sector data tables so that those calls and sectors used during that hour are not displayed as selected in the check-box. The map view is also updated so that those sectors used during the hour are not highlighted.
For each of the target phone numbers you selected in Sources, this displays the target phone users who are using sectors within a specified distance of each other within a specified time interval. Click beside the sector details to display the details of all the target phone numbers that used the included sectors during the specified time interval. This analysis is designed to help you identify target phone users who were physically close to each other during similar times. You define the time interval and sector inclusion distance for this analysis using the Advanced options dialog box.
If the sector used in the analysis was from handover or TA data then the result is labeled with HO or TA respectively. For example:

This analysis requires you to upload cell tower data.
The following columns are displayed:
- Common location/Target number: at the folder level this displays the details of one of the included sectors. Under the folder it lists all the target phone numbers that used this sector or another sector within the sector inclusion distance and during the specified time interval. Note, the sector details that are displayed are those of only one of the included sectors, however if there are multiple included sectors they are all displayed on the map with a bold black outline when you select Zoom to this item.
- Time interval/Name: in the folder level row this displays the time interval. Under this it displays the phone user names. Note, you can define the length of the time interval using the Advanced options dialog box.
- First call: this displays the first time a call or SMS was made or received using the included sectors during the specific time interval.
- Last call: this displays the last time a call or SMS was made or received using the included sectors during the specific time interval.
- Voice: this displays the total call count made or received using the included sectors during the specific time interval.
- SMS: this displays the total SMS count made or received using the included sectors during the specific time interval.
- Data: this displays the total data count made or received using the included sectors during the specific time interval.
- Total: this displays the combined voice call, SMS and data counts made or received using the included sectors during the specific time interval.
- Minutes: this displays the total number of minutes for all voice calls during the specific interval.
The analysis list interacts with the map and CDR data and Sector data tabs so that when you right-click any of the sectors you can:
- Zoom to this item: select to zoom to the latitude and longitude of the sector on the map. This sector and all other included sectors are displayed with a bold black outline.
- Select all CDRs for this item: this updates the CDR data and Sector data tables so that only those calls and sectors used by the selected common location-time item are displayed as selected in the check-box. The map view is also updated to only highlight those sectors used during this item.
- Deselect all CDRs for this item: this updates the CDR data and Sector data tables so that those calls and sectors used by the selected common location-time item are not displayed as selected in the check-box. The map view is also updated so that those sectors used during this item are not highlighted.
This analysis is designed to help you identify phone users who were close to a target location during similar times.
For each of the target phone numbers you selected in Sources, this displays the locations where two or more target phones were close to a target location within a specified time interval. The analysis is performed using the same method used in the common-location time analysis to determine if the target phones were using sectors within a specified distance of each other within a specified time interval; it then additionally analyzes whether or not the sector is located within the target location's buffer. Click beside the target location to display the sector details and the details of all the target phone numbers that used the included sectors during the specified time interval. You define the time interval and sector inclusion distance for this analysis using the Advanced options dialog box.
If the sector used in the analysis was from handover or TA data then the result is labeled with HO or TA respectively.
This analysis requires you to upload cell tower data.
The following graphic displays an example of this analysis.
The following columns are displayed:
- Common location/Target number: at the folder level this displays the details of one of the case's target locations. Under the folder it lists the included sectors that were used by one or more target phone number during the specified time interval.
- Time interval/Name: in the folder level row this displays the time interval. Under this it displays the phone user names. Note, you can define the length of the time interval using the Time interval (minutes).
- First call: this displays the first time a call or SMS was made or received using the included sectors during the specific time interval.
- Last call: this displays the last time a call or SMS was made or received using the included sectors during the specific time interval.
- Voice: this displays the total call count made or received using the included sectors during the specific time interval.
- SMS: this displays the total SMS count made or received using the included sectors during the specific time interval.
- Data: this displays the total data count made or received using the included sectors during the specific time interval.
- Total: this displays the combined voice call, SMS and data counts made or received using the included sectors during the specific time interval.
- Minutes: this displays the total number of minutes for all voice calls during the specific interval.
The analysis interacts with the map and the Data view, for example when you right-click any of the sectors you can:
- Zoom to this item: select to zoom to the latitude and longitude of the sector on the map. This sector and all other included sectors are displayed with a bold black outline.
- Select all CDRs for this item: this updates the CDR data and Sector data tables so that only those calls and sectors used by the selected item are displayed as selected in the check-box. The map view is also updated to only highlight those sectors used during this item.
- Deselect all CDRs for this item: this updates the CDR data and Sector data tables so that those calls and sectors used by the selected item are not displayed as selected in the check-box. The map view is also updated so that those sectors used during this item are not highlighted.
For the target phone numbers you selected in Sources, this displays the target phone users that were identified as being at any of the locations. Click beside the phone number to display the details of all the target locations the phone number was in. This analysis is designed to help you identify which target phone users were at which target locations. The analysis only runs on target locations which have a Location buffer set.
This analysis requires you to upload cell tower data.
The following columns are displayed:
- Name: for the folder this displays the name you have entered for the phone number. For all other items this displays names that have come from uploaded files such as phone data and public record data.
- First call: this displays the first time a call or SMS was made or received at the target location.
- Last call: this displays the last time a call or SMS was made or received at the target location.
- Voice: this displays the total call count made or received at the target location.
- SMS: this displays the total SMS count made or received at the target location.
- Total: this displays the combined voice call and SMS call counts made or received at the target location.
- Minutes: this displays the total number of minutes for all voice calls at the target location.
The analysis list interacts with the map and CDR data and Sector data tabs so that when you right-click any of the locations you can:
- Zoom to this item: select to zoom to the latitude and longitude of the selected location on the map.
- Select all CDRs for this item: this updates the CDR data tab so that only those calls associated with the selected person's device at location item are displayed as selected in the check-box. The Sector data tab is updated to display only those sectors as selected in the check-box. The map view is also updated to highlight the sectors.
- Deselect all CDRs for this item: this updates the CDR data and Sector data tables so that those calls associated with the selected person's device at location item are not displayed as selected in the check-box. The map view is also updated so that the sectors are not highlighted.
This displays each of the locations and for the target phone numbers you selected in Sources, it identifies all the target phone numbers that were at each location. Click beside the location to display the details of all the target phone numbers that were at the location. This analysis is designed to help you identify all the phone users that were at each target location. The analysis only runs on target locations which have a Location buffer set.
This analysis requires you to upload cell tower data.
The following columns are displayed:
- Name: for the folder this displays the name you have entered for the phone number. For all other items this displays names that have come from uploaded files such as phone data and public record data.
- First call: this displays the first time a call or SMS was made or received at the target location.
- Last call: this displays the last time a call or SMS was made or received at the target location.
- Voice: this displays the total call count made or received at the target location.
- SMS: this displays the total SMS count made or received at the target location.
- Total: this displays the combined voice call and SMS call counts made or received at the target location.
- Minutes: this displays the total number of minutes for all voice calls at the target location.
The analysis list interacts with the map and CDR data and Sector data tabs so that when you right-click any of the locations you can:
- Zoom to this item: select to zoom to the latitude and longitude of the selected location on the map.
- Select all CDRs for this item: this updates the CDR data tab so that only those calls associated with the selected person's device at location item are displayed as selected in the check-box. The Sector data tab is updated to display only those sectors as selected in the check-box. The map view is also updated to highlight the sectors.
- Deselect all CDRs for this item: this updates the CDR data and Sector data tables so that those calls associated with the selected person's device at location item are not displayed as selected in the check-box. The map view is also updated so that the sectors are not highlighted.
For the device identifiers you selected in Sources, this displays where the device was during the events on the Event timeline. The analysis uses both GPS ping and CDR data. Click  beside the location's event to display the details of all the devices.
You can configure this analysis to display the results in a variety of orders by using the  icons on the title bar of the analysis. These allow you to display the results in the following structures:
- Event / Identifier / Location
- Event / Identifier / Hour / Location
- Event / Identifier / Hour / Event
The following columns are displayed:
-
Name: for the identifier folder this displays the name you have entered for the identifier.
-
First event and Last event: this displays the start and end date/time for the respective row. For example for the:
-
Event folder, it displays the start and end of the event as defined on the Locations of interest screen or the Event timeline screen.
-
Identifier folder, it displays the time of the first and last events for that identifier number during the time period displayed in the Event folder.
-
Each individual event, it displays the individual event's start and end time.
-
- Total pings: this displays the total GPS ping count for the respective row.
- Total towers: this displays the total tower count for the respective row.
- Total: this displays the combined ping and tower counts for the respective row.
- Avg Distance (towers): this displays the average distance the person moved during the event based on the towers used.
- Max distance (towers): this displays the maximum distance the person moved during the event based on the towers used.
The analysis list interacts with the map and data tabs. For example, when you right-click any of the device identifiers you can:
- Zoom to this item: select to zoom to the latitude and longitude of the selected event on the map.
- Select all CDRs for this item: this updates the CDR data tab so that only those calls associated with the selected device item are displayed as selected in the check-box. The Sector data tab is updated to display only those sectors as selected in the check-box. The map view is also updated to highlight the sectors.
- Deselect all CDRs for this item: this updates the CDR data and Sector data tables so that those calls associated with the selected device item are not displayed as selected in the check-box. The map view is also updated so that the sectors are not highlighted.
If you click Zoom on an hour folder, the map boundary is set so that it displays the locations of all the events within the hour folder.
For further information refer to Analyzing where a person was during events on the Events timeline.
For each of the target phone numbers you selected in Sources, this displays by default the top ten most frequently used sectors, displaying for each sector a break down of the number of calls by the hour from 00 (00:00 - 00:59) through 23 (23:00 - 23:59) and by the day. Click beside a target phone number to display the details of the frequently used sectors by hour. This analysis is designed to help you identify where a phone user may be located on a specific weekday and time.
You can configure this analysis to display the results in a variety of orders by using the icons on the title bar of the analysis. These allow you to display the results in the following structures:
- Phone number / Sector / Hour / Weekday
- Phone number / Weekday / Hour / Sector
- Phone number / Sector / Weekday / Hour
You can change the number of results displayed from the default of ten using Items to calculate. You can change the type of calls used by the analysis using Include call types.
The following columns are displayed:
-
Total: this displays the combined voice call and SMS call counts made or received using the sector. By default the results are ordered using this column with the most frequently used sector first.
NOTE: The Total count displayed on the Call analysis tab will likely not match the number of rows on the CDR data tab. This is because on the Call analyses tab it lists start, handover and end cells separately, whereas on the CDR data tab they are all in the one row. For example, in the following graphic there is a count of 8 on the Call analysis tab and the CDR data tab has 6 rows.
- Voice: this displays the total call count made or received using the sector. This includes incoming calls, outgoing calls and other calls whose type cannot be identified.
- In call: this displays the total call count when the target number is receiving an incoming call using the sector.
- Out call: this displays the total call count when the target number is initiating an outgoing call using the sector.
- Other call: this displays all calls using the sector whose type cannot be identified ,
- SMS: this displays the total SMS count using the sector.
- In SMS: this displays the total SMS count when the target number is receiving an incoming SMS using the sector.
- Out SMS: this displays the total SMS count when the target number is sending an outgoing SMS using the sector.
- All others: this displays the total count of all other types of call including data calls, TA, PCMD and HO.
How each sector is titled depends on what information is available in the CDR. The operator name is always displayed. The following details are optional: MSC (switch) name; LAC; Cell id (CID); and Sector id (S). For example, an ATT sector with a LAC of 12345 and a Cell ID of 98765 is titled “ATT[LAC=12345,CID=98765]”. Any sectors without correlated latitude/longitude values include "(no location)" at the end of the title. For example "Sprint[LAC=987](no location)”.
The termination towers are also included in the results unless they are specifically excluded using Exclude terminating towers on the Advanced options dialog box. This is useful as some events may only have end towers, therefore the following indicators are also displayed:
-
S: Start tower
-
H: Handover
-
E: End tower
-
no location: if the start tower and end tower have no valid latitude/longitude
The following graphic shows examples of these indicators:
If the start and end towers are the same then only one event is displayed ending in S. If the start and end towers are different then there is one event displayed for each cell with the starting tower displaying S and the ending tower displaying E.
You do not need to upload cell tower data to display the analysis list. However if you additionally want the analysis list to interact with the map and CDR data and Sector data tabs then you must upload cell tower data, then when you right-click any of the sectors by hour you can:
- Zoom to this item: select to zoom to the latitude and longitude of the selected sector on the map. Note, this is not possible for sectors marked with "(no location)".
- Select all CDRs for this item: this updates the CDR data tab so that only those calls using the sector are displayed as selected in the check-box. The Sector data tab is updated to display only that sector as selected in the check-box. The map view is also updated to highlight the sector.
- Deselect all CDRs for this item: this updates the CDR data and Sector data tables so that those calls and sectors used with the sector are not displayed as selected in the check-box. The map view is also updated so that the sector is not highlighted.
For each of the target phone numbers you selected in Sources, this displays by default a maximum of the top ten sectors where the phone is located for a long period of time without making or answering any calls or sending any SMS messages. Note, if a phone never meets the criteria set for this analysis then the phone number will not display in the analysis. Click beside a target phone number to display the details of the idle sectors. This analysis is designed to help you identify where the phone user is spending long periods of time but not using their phone, for example where they are potentially sleeping or working. For this analysis to be of use there must be a significant amount of calls and the calling period must be greater than 48 hours, however the recommended minimum period is one week. If possible uploading historical data for at least one month will give you a more useful result.
You can change the number of results displayed from the default of ten using Items to calculate and you can set the idle time using Minimum idle time (hours).
The following columns are displayed:
- Idle periods: this displays the total number of idle periods detected at the sector.
- Total idle duration (hours): this displays the total number of hours of idle periods at the sector.
- Avg idle duration (hours): this displays the average number of hours of idle periods at the sector. That is, it is the Total idle duration (hours) divided by the Idle periods.
You do not need to upload cell tower data to display the analysis list. However if you additionally want the analysis list to interact with the map and CDR data and Sector data tabs then you must upload cell tower data, then when you right-click any of the idle sectors you can:
- Zoom to this item: select to zoom to the latitude and longitude of the selected sector on the map. Note, this is not possible for idle sectors marked with "(no location)".
- Select all CDRs for this item: this updates the CDR data tab so that only those calls using the idle sector are displayed as selected in the check-box. The Sector data tab is updated to display only that sector as selected in the check-box. The map view is also updated to highlight the sector.
- Deselect all CDRs for this item: this updates the CDR data and Sector data tables so that those calls and sectors used with the idle sector are not displayed as selected in the check-box. The map view is also updated so that the sector is not highlighted.
For each of the social media targets you selected in Sources, this displays by default the top ten most frequently contacted social media accounts for each. The details that are displayed are those of the social media account's Account identifier. Click beside a social media target to display the details of the frequently contacted social media accounts. You can change the number of results displayed from the default of ten using Items to calculate.
The following columns are displayed:
- Name: if the name of the person is available in OSS-ESPA's person database then it is displayed.
- ID Number: displays the account identifier.
-
First contact: this displays the first time there was contact between the two social media accounts. This, along with Last contact allows you to investigate the contact pattern between the two accounts. The following are examples of how this data may help your investigation:
- The social media account may be in this most frequently contacted list but only because there were many exchanges during the time of the crime and outside of that time there was no contact. Depending on your crime this may indicate they were an accomplice.
- Anyone who contacts often but stops contacting around the time of a crime, for example a murder or an abduction, is a potential suspect. For example, a boyfriend may contact his girlfriend frequently, but if his last contact is immediately before the time his girlfriend is murdered then this may indicate that he knew of the murder and therefore he stopped contacting her.
- A new frequent contact may be a potential suspect. For example, the time of the first contact may indicate that a victim just met the contact a few days prior to the crime.
- Last contact: this displays the last time there was contact between the two social media accounts. This, along with First contact allows you to investigate the contact pattern between the two accounts. Refer to the examples in First contact on how this data may help your investigation.
- Total: this displays the contact counts between the two social media accounts. By default the results are ordered using this column with the most frequently contacted account first.
Edit person: right-click any of the targets to open the Edit person screen. This allows you to quickly update the personal details in the global person database. When you return to the ESPA analysis center you must click Refresh to apply your updates to the screen.
Edit associated person: right-click any of the contacts to open the Edit person screen. This allows you to quickly update the associates personal details in the global person database. When you return to the ESPA analysis center you must click Refresh to apply your updates to the screen.
This analysis requires you to have selected a minimum of two social media accounts in Sources. For the accounts you selected, this displays all the common contacts which two or more accounts have communicated with. Click beside a common contact to display the details of the individual contacts. The details that are displayed are those of the social media account's Account identifier. The following columns are displayed:
- Name: if the name of the person is available in OSS-ESPA's person global database then it is displayed.
- ID Number: displays the account identifier.
- First contact: this displays the first time contact was made between the two social media accounts. This, along with Last contact allows you to investigate the contact pattern between the two accounts. The following are examples of how this data may help your investigation:
This data can be used in a similar way to the first and last contacts in Frequent contacts, however additionally you can analyze multiple suspects together, or the suspect's and victim's contact pattern with a common number.
- If a person is contacting both the suspect and the victim after the crime to find out the location of the victim it may suggest they are unaware of the crime. You may therefore decide to exclude the person as a suspect.
If a person is contacting the suspect, but has stopped contacting the victim it may indicate that they knew of the murder and they therefore may be an accomplice. You may therefore decide to include the person as a suspect.
- Last contact: this displays the last time contact was made between the two social media accounts. This, along with First contact allows you to investigate the contact pattern between the two accounts. Refer to the examples in First contact on how this data may help your investigation.
- Total: this displays the contact count between the two social media accounts.
Edit person: right-click any of the targets to open the Edit person screen. This allows you to quickly update the personal details in the global person database. When you return to the ESPA analysis center you must click Refresh to apply your updates to the screen.
Edit associated person: right-click any of the contacts to open the Edit person screen. This allows you to quickly update the associates personal details in the global person database. When you return to the ESPA analysis center you must click Refresh to apply your updates to the screen.
For each of the social media targets you selected in Sources, this displays a list of all the types of communications received and their frequency.
Click beside a social media target to display the list.
The following columns are displayed:
-
Type: displays the communication type as is displayed on the Type column of the Communication data.
-
Quantity: displays the number of each communication type received.
For each of the device identifiers you selected in Sources, this analysis displays the IP addresses that they connected to in order of frequency. You can review the first digits of the IP addresses to get a general idea of a person's most frequent IP locations. These IP addresses may be either the person's location or the location of the IP address they are accessing. Note, to perform this analysis, ensure Use data call records is selected on the Advanced options dialog box.
If you run a Frequent IP IQ packet, it provides you with the list of the IP addresses which you can then send to the operators to determine their locations, alternatively you could download a csv file of the analyses from the top of this tab using . You may then wish to add the IP's location to the case as a target location. For further information refer to Using IP locations.
Click  beside an identifier to display the details of the individual IPs.
You can configure this analysis to display the results in two ways by using the icon on the title bar of the analysis. These allow you to display the results in the following structures:
- Identifier / IP
- Identifier / IP / Port
The following columns are displayed:
- Identifier/IP: the folder displays the device identifier and the IP addresses are listed within the folder.
- Name: if the name of the person is available in OSS-ESPA's person global database then it is displayed.
- First seen: this displays the first time the IP address was used.
- Last seen: this displays the last time the IP address was used.
- Total: this displays the total number of times the IP address was used.
This analysis requires you to have selected a minimum of two device identifiers in Sources. For the identifiers you selected, this displays the common IP addresses that two or more devices connected to. These IP addresses may be either the person's location or the location of the IP address they are accessing. Common IP addresses can indicate common contacts such as where they are ordering online drug supplies. Note, to perform this analysis, ensure Use data call records is selected on the Advanced options dialog box.
If you run a Common IP IQ packet, it provides you with the list of the IP addresses which you can then send to the operators to determine their locations. You may then wish to add the IP's location to the case as a target location. For further information refer to Using IP locations.
Click beside a common IP address to display the details of the individual identifiers that used that IP.
The following columns are displayed:
- IP/Identifier: the folder displays the IP addresses and the 2 or more device identifiers that used the IP address are listed within the folder.
- Name: if the name of the person is available in OSS-ESPA's person global database then it is displayed.
- First seen: this displays the first time the IP address was used.
- Last seen: this displays the last time the IP address was used.
- Total: this displays the total number of times the IP address was used.
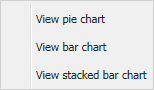
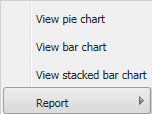

For each analysis, if you right-click a folder a menu appears which allows you to view the selected analysis results in a graphical format. Click:
- View pie chart: a window opens displaying the selected analysis results as a pie chart. Use Data to select what results the chart displays, either total (the default), voice, SMS, or minutes. This window also allows you to add the displayed chart into a report by clicking Add into report. For further information refer to Using call analysis results in advanced analysis reports. This menu item is not available for Sector by hour and Idle sectors analyses.
- View bar chart: a window opens displaying the selected analysis results as a bar chart. Use Data to select what results the chart displays, either total (the default), voice, SMS, or minutes. This window also allows you to add the displayed chart into a report by clicking Add into report. For further information refer to Using call analysis results in advanced analysis reports. This menu item is not available for Sector by hour analysis.
- View stacked bar chart: a window opens displaying the selected analysis results as a bar chart of the cumulative voice and SMS calls. This window also allows you to add the displayed chart into a report by clicking Add into report. For further information refer to Using call analysis results in advanced analysis reports. This menu item is not available for Sector by hour and Idle sectors analyses.
-
View stacked column chart: a window opens displaying the Sector by hour analysis results as a column chart. This window also allows you to add the displayed chart into a report by clicking Add into report. For further information refer to Using call analysis results in advanced analysis reports. This menu item is only available for Sector by hour analysis.
- Report: to add the selected analysis results directly into an advanced analysis report. This menu item is only displayed if you have a <Report name> tab open.
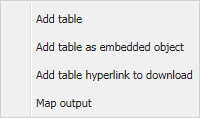
If you have a <Report name> tab open, then for each analysis, if you right-click a folder and select Report then this menu appears which allows you to add the selected call analysis results into an advanced analysis report. The call analysis is added to the report in the section of the report you currently have selected on the <Report name> tab. Click:
- Add table: select to include the contents of the selected call analysis directly in the report as a table.
- Add table as embedded object: select if you want to include the selected call analysis as an embedded object within the report. This means that the data is available as a .txt file. You can then click on the object in the report to open it in your text editor application.
- Add table hyperlink to download: select if you want to include the selected call analysis as a link within your report. The link appears in your report along with a password. If you click the link and enter the password the file opens in your text editor application.
- Map output: this option is only available for Sector by hour and Idle sector analyses. Select if you want to include a map of the sectors for the selected phone number within your report.